
The single skill that separates a forensic examiner from someone running tools is knowing how to acquire evidence without changing it.
Disk imaging sounds like a technical detail - copy bits from A to B. In practice it is the moment where every later finding either holds up in court or gets thrown out. The tool you choose, the write-blocker you use (or skip), the hash you record (or forget), and the chain of custody you start (or do not) determine whether the investigation produces evidence or hearsay.
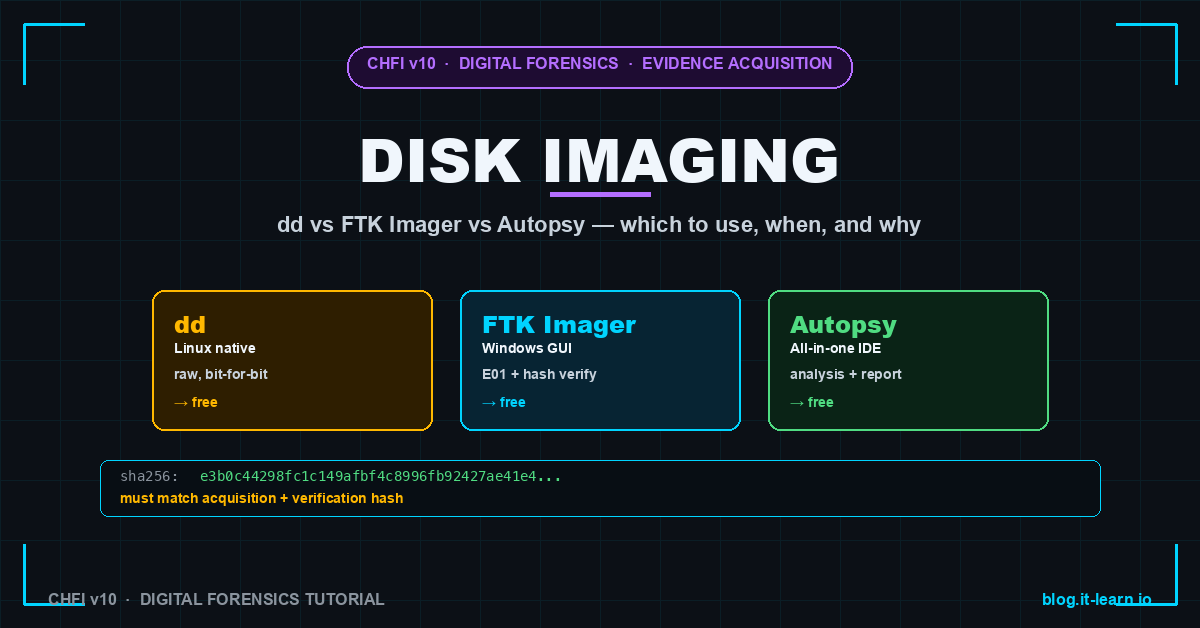
This post compares the three tools you will actually use as a CHFI candidate or working examiner: dd, FTK Imager, and Autopsy. We cover when to reach for each, what court admissibility requires, the hash-verification ritual that has to happen every single time, and the operational gotchas the first 10 acquisitions teach you painfully.
What forensic disk imaging actually is
Three properties separate forensic imaging from a regular file copy:
- Bit-for-bit completeness. Every sector. The boot sector. Slack space inside file allocation units. Deleted file contents still present until overwritten. Unallocated free space that may contain prior file fragments. Hidden Protected Areas (HPA) and Device Configuration Overlays (DCO) on the drive. A
cp -rof mounted file contents misses 70–90% of what matters. - Read-only acquisition. Nothing about the imaging process modifies the source drive - not file access times, not the journal, not the partition table. The OS would touch the drive on connection if you let it; a write-blocker physically prevents that.
- Cryptographic integrity proof. A SHA-256 hash (or two hashes - SHA-256 + MD5 for legacy compatibility) is computed against the source drive at acquisition time, then re-computed against the image to verify they match. The hash is logged in the chain of custody. Any later analysis that produces a different hash invalidates the image.
You do not get any of those three from a normal copy. You get all three from the right tool, used the right way.
The three tools, compared
| Tool | OS | License | Output | Hash | GUI | Best for |
|---|---|---|---|---|---|---|
| dd | Linux/macOS | Built-in | Raw .img | Separate file via sha256sum | No | Scriptable bulk acquisition, lab environments, when you need maximum speed and no metadata |
| FTK Imager | Windows / Linux (CLI port) | Free (AccessData) | E01, AD1, raw | Embedded in E01 metadata | Yes | Court-ready acquisitions, on-scene work, single-investigator workflow |
| Autopsy | Windows / macOS / Linux | Free (Sleuth Kit) | E01, raw | Embedded in case database | Yes (full IDE) | End-to-end case work where imaging is one step among many - keyword search, timeline, registry, file carving |
Note that all three are free. The “professional” forensics suites (EnCase, X-Ways) add convenience and workflow but the underlying acquisition is functionally the same.
dd - the Unix way
1# Acquire — source drive at /dev/sdb, output to image file
2sudo dd if=/dev/sdb of=/mnt/evidence/case-001-suspect-drive.img \
3    bs=64K conv=noerror,sync status=progress
4
5# Hash the source AND the image — they must match
6sudo sha256sum /dev/sdb
7sha256sum /mnt/evidence/case-001-suspect-drive.img
Strengths: built into every Linux distro, scriptable, parallelizable across many drives, no licensing concerns, no GUI dependencies for headless servers.
Weaknesses: no metadata in the image itself, no compression, no segmentation (a 4 TB drive produces a 4 TB file), no embedded hash, no progress UI by default (status=progress is the magic flag), no error reporting in the output format. You provide all the structure around it.
The conv=noerror,sync flag pair is critical. noerror keeps reading past a bad sector instead of aborting. sync writes a zero-padded block in place of the unreadable one so byte offsets stay aligned in the image. Without sync, your image silently shrinks at every bad sector and every subsequent offset is wrong.
FTK Imager - the field workhorse
FTK Imager is the tool you will see on every laptop in an IR engagement. It is free, runs on Windows (with a Linux CLI port for headless), and produces E01 images that other forensic tools (EnCase, X-Ways, Autopsy, Magnet AXIOM) all read natively.
The acquisition flow:
- Connect the source drive via a hardware write-blocker
- Launch FTK Imager →
File→Create Disk Image - Select physical drive (not logical partition - you want everything)
- Fill in case metadata (examiner name, case number, evidence number, description)
- Choose output: E01 format, segment size 2 GB (for storage portability)
- Enable both MD5 and SHA-256 hash calculation
- Acquire - FTK Imager will compute the source hash on-the-fly, write segments, then re-verify by computing the image hash
The output is a .E01 (plus .E02, .E03, … for segments) along with a .txt log file containing the metadata, hashes, and acquisition timeline. That log file IS the start of your chain of custody.
Autopsy - the all-in-one IDE
Autopsy (built on The Sleuth Kit) is what you reach for when imaging is the first step in a broader analysis workflow rather than a standalone task. You create a Case, add a Data Source (the drive or an existing image), and Autopsy handles the imaging, file system parsing, keyword indexing, timeline building, registry analysis, file carving, and report generation in one project.
Use Autopsy when:
- You are doing the analysis on the same workstation you used for acquisition
- You want one tool to handle the entire case from cradle to grave
- You are training and want to see how each forensic capability connects
- You are operating on a budget where every dollar matters (Autopsy is fully free and open-source under the Apache license)
Use FTK Imager + a separate analysis tool when:
- The acquisition needs to happen at a remote scene and analysis happens in a lab
- The chain of custody requires the image to leave the acquisition workstation untouched
- The analysis team uses a different tool (EnCase, X-Ways, Magnet, Velociraptor)
The hash-verification ritual
This is non-negotiable. Every forensic image goes through:
1. HASH the source drive       → SHA256: aabb...
2. ACQUIRE the image            → /evidence/case-001.E01
3. HASH the image               → SHA256: aabb...   (must match step 1)
4. RECORD both hashes in the chain of custody form
5. STORE the image in write-protected storage
6. RE-HASH before any analysis  → SHA256: aabb...   (must still match)
7. RE-HASH at end of analysis   → SHA256: aabb...   (must still match)
Skip any of those steps and a defense attorney has a foothold to challenge the evidence. Hash mismatch at step 6 or 7 means the image was modified during your custody - the image is no longer admissible and your career has a bad day.
Why SHA-256 over MD5: MD5 has documented collisions. A defense expert can show in court that two different drives could produce the same MD5 hash, casting doubt on whether your image actually corresponds to the source. SHA-256 has no known collisions and is the current forensic standard. Many examiners run both for legacy tool compatibility, but SHA-256 is the one that matters.
Write-blockers: hardware vs software
A write-blocker prevents any write operation to the source drive. Without one, the moment you connect the drive to your workstation, the OS may:
- Update file access timestamps when it auto-mounts and indexes
- Write a
System Volume Informationfolder if it sees an unfamiliar Windows volume - Replay the NTFS journal on a non-cleanly-unmounted drive
- Modify partition tables if it detects “corruption” and offers to “fix” it
Each of those modifies the drive. Each of those breaks chain of custody. Each of those gives the defense grounds to suppress the evidence.
Hardware write-blockers (Tableau, Wiebetech, CRU Forensic) are USB/SATA bridges that physically intercept write commands at the protocol level. The OS sees a drive, but every write returns a hardware-level error. Cost: $200–$800. Court-admissible everywhere. Required by federal cases and most state jurisdictions.
Software write-blockers (mount-as-read-only flags on Linux, registry tweaks on Windows) are policy-based - the OS chooses to honor them. They work for lab triage but are not court-admissible because a determined defense attorney can argue that a kernel bug or accidental remount could have allowed a write. Use software write-blocking for learning and lab work; use hardware for anything that might end up in front of a judge.
What to do when the drive is failing
Failing drives are the realistic case. A suspect’s laptop has been beat up, dropped, or already partially wiped. When dd hits a bad sector:
1# The flag pair that lets you keep going
2sudo dd if=/dev/sdb of=/mnt/evidence/case-001.img \
3    bs=64K conv=noerror,sync status=progress
4
5# Better — use ddrescue for failing drives. Reads good sectors fast,
6# comes back for the bad ones, logs which sectors failed
7sudo ddrescue /dev/sdb /mnt/evidence/case-001.img /mnt/evidence/case-001.log
ddrescue is the right tool for any drive showing SMART errors, sector read failures, or unusual noises. It maintains a log of which sectors were successfully read, which were retried, and which remain unreadable. You can resume an interrupted acquisition without re-reading the good sectors.
Document the bad-sector count and exact offsets in the chain of custody. The court understands that “the drive was physically failing” is a valid reason for some sectors to be unreadable, but you have to prove that the unreadable sectors were unreadable on the drive itself, not because of an error in your tool.
Common mistakes (and what they cost)
1. Imaging a logical partition instead of the physical drive. You miss unallocated space, deleted files, and any hidden partitions. The defense argues you cherry-picked.
2. Connecting the source drive to a Windows host without a write-blocker. Windows auto-mounts, indexes, and may write a System Volume Information folder. Source drive hash changes from what you’d expect; the evidence is contaminated.
3. Failing to record the source hash before acquisition. You cannot prove the image matches the source if you do not know what the source’s hash was. The image’s hash alone is not enough.
4. Using MD5 only. Defense expert produces a known MD5 collision pair, argues that “matching MD5 does not prove the image matches the source.” If you have SHA-256 alongside, this argument disappears.
5. Storing the image on the same workstation that did the acquisition. Acquisition workstations have keyloggers, USB activity logs, and other artifacts that defense will request access to. Move the image to a dedicated evidence drive immediately after acquisition.
6. Not noting the exact time, examiner name, and witness on the acquisition log. Chain of custody starts at acquisition. Missing fields = unbreakable chain has a broken first link.
7. Mixing case data on the same evidence drive. One drive, one case. Cross-contamination is a defense attorney’s favorite challenge.
Hands-on lab - get started in 30 minutes
If you do not have a target drive, use a small USB stick (4–16 GB) you can dedicate to learning:
 1# 1. Identify the device — DO NOT typo this. dd writes to whatever you tell it.
 2sudo fdisk -l
 3
 4# 2. Hash the source
 5sudo sha256sum /dev/sdX | tee source.hash
 6
 7# 3. Image with dd
 8sudo dd if=/dev/sdX of=evidence-test.img bs=64K conv=noerror,sync status=progress
 9
10# 4. Hash the image
11sha256sum evidence-test.img | tee image.hash
12
13# 5. Compare — must match exactly
14diff <(awk '{print $1}' source.hash) <(awk '{print $1}' image.hash)
15echo "Exit code: $?  (0 = match)"
Repeat with FTK Imager on Windows. Then load the same drive into Autopsy. By the time you have done all three, you have seen the same image acquisition through three different tool lenses - which is exactly the muscle memory the CHFI exam tests.
CHFI exam tips
Topics from this post that show up in the CHFI v10 (312-49) exam:
- Difference between raw dd images, E01, and AFF formats - when each is used
- Why hardware write-blockers are required for court-admissible acquisitions
- SHA-256 vs MD5 - current standard, why MD5 is deprecated, when both are used together
- The
conv=noerror,syncflag pair and why it matters - HPA and DCO detection and why they must be addressed in acquisition
- Chain of custody starts at acquisition - what fields the log must contain
- E01 metadata fields and what each one means in court
The exam likes scenario questions: “An examiner used dd with conv=noerror but not sync - what is the consequence?” Answer: the image is silently shorter than the source, every byte offset after the first bad sector is wrong, and the hash will not match.
Related Posts
- Cybersecurity Incident Response: Basics and How to Get Started - the broader IR context disk imaging fits inside
- Incident Response Plan Template for Mid-Market Customers - the IR plan that should include forensic acquisition procedures
- Reading Vulnerability Reports: CVE, CVSS, EPSS - companion CVE/risk skill set
- MITRE ATT&CK Framework for SEs - adversary technique mapping that informs what to look for in the image
Practice with free flashcards, 1,200 questions, and 15 forensics modules at forensics.it-learn.io — built specifically for the CHFI v10 exam (312-49). Free with a quick signup.
Tested against ext4, NTFS, and APFS source drives using a Tableau T8u write-blocker. dd 9.4, FTK Imager 4.7, Autopsy 4.21.0.


